Concept artists
Start with a concise description of a character, prop, creature, or environment asset.
You get a fast blockout that can guide proportions, silhouettes, and early visual decisions.
hitem3d ai-powered 3d model generatorVersion guide
Understand the setup, workflow, options, and trade-offs associated with this version before you begin creating a 3D model.

Before you begin
A successful run starts with a clear subject, a usable reference, and realistic expectations about what an automated 3D workflow can produce.
Start with a concise description of a character, prop, creature, or environment asset.
You get a fast blockout that can guide proportions, silhouettes, and early visual decisions.
hitem3d ai-powered 3d model generatorUse a simple object description or reference image when exploring several form directions.
You can compare early concepts before investing time in detailed manual modeling.
image to 3d modelChoose a recognizable subject with separated forms and avoid tiny details in the first attempt.
The resulting model is easier to inspect, revise, and prepare for a downstream 3D workflow.
split for 3d printingGenerate a visual starting point for a prototype, mood board, or asset discussion.
The team gets something concrete to review instead of relying only on a written brief.
hitem3d for softwareFull run-through
Treat the first generation as a guided draft: define the subject, inspect the result, then refine the parts that matter most.
Write one focused prompt describing the object, viewpoint, style, key materials, and any feature that must remain recognizable. Remove competing ideas from the first request.
Submit the request and review the model from multiple angles. Check the silhouette, major openings, thin pieces, contact points, and whether the output matches the intended subject.
Change one or two variables at a time, such as proportions, surface detail, pose, or simplicity. Keep the strongest parts of the previous attempt as your reference for the next pass.
Continue exploring
Choose the page that matches your next question, whether you want another input method, a beginner-friendly guide, or a direct comparison.
Option map
These practical choices shape the quality and usefulness of a generated asset more than adding extra adjectives to a prompt.
Prompt style
Focused first attempt
One subject with a clear visual description
Exploratory first attempt
Several possible interpretations of the same idea
Reference use
Focused first attempt
A single strong reference or defined visual target
Exploratory first attempt
Loose references used for mood and direction
Detail level
Focused first attempt
Large, readable forms and limited fine detail
Exploratory first attempt
More surface variation and decorative detail
Best purpose
Focused first attempt
A dependable blockout for refinement
Exploratory first attempt
Fast ideation and visual exploration
Revision strategy
Focused first attempt
Change one priority issue per iteration
Exploratory first attempt
Try broader variations between attempts
Inspection focus
Focused first attempt
Silhouette, stability, openings, and proportions
Exploratory first attempt
Style, novelty, and overall visual impression
Likely trade-off
Focused first attempt
Less variety in exchange for clearer evaluation
Exploratory first attempt
More variety with less predictable structure
Honest constraints
Version labels do not remove the usual limits of automated 3D generation. Plan for inspection and cleanup when the asset has strict requirements.
A generated object should not be assumed to match a precise real-world measurement or engineering tolerance.
Workaround
Use the output as a visual starting point, then measure and resize it in a dedicated 3D application.
Wires, fingers, blades, handles, and other narrow elements may become weak, merged, or incomplete.
Workaround
Simplify the first prompt, strengthen delicate parts, and inspect the model from several views.
A visually convincing result is not automatically clean, optimized, riggable, or ready for a specific software pipeline.
Workaround
Retopologize, repair surfaces, and validate the asset in the software where it will be used.
Complex subjects with hidden surfaces, repeated details, or unusual poses can require several generations.
Workaround
Break the goal into smaller decisions and refine the most important mismatch first.
Visual checkpoint
The useful change is not simply generating again; it is making the subject clearer, more stable, and closer to the intended use.
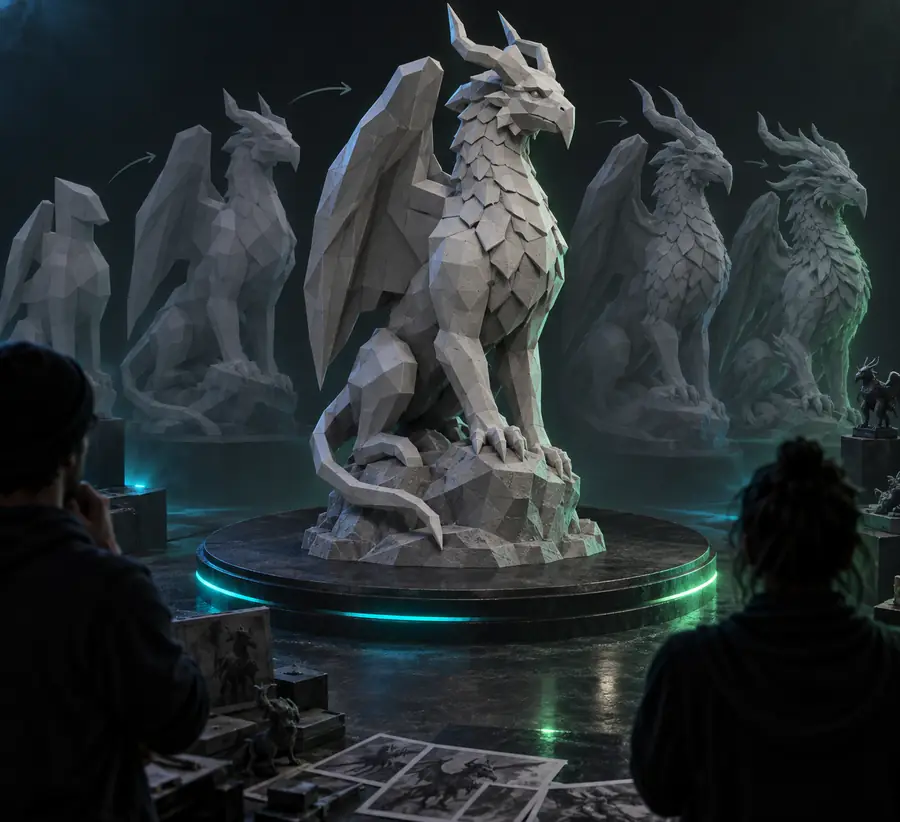 First pass
 Refined pass
Start with a clear brief
Use a short, specific description, review the first result carefully, and refine only the details that affect your intended use. hitem 3d v2 0 is most useful when treated as an iterative modeling assistant rather than a guarantee of final production quality.
Generate 3D modelCommon questions
These answers clarify what people usually want to know when searching for this version and deciding whether to try it.
hitem 3d v2 0 refers to a version-specific 3D generation workflow associated with the hitem3d platform. In practical terms, the page is useful for understanding how to prepare an input, run a generation, inspect the result, and refine it.
Begin with one clear subject and describe its important shape, style, and features. Generate a first pass, inspect it from several angles, then revise the most important mismatch instead of changing every part of the prompt at once.
It can provide a useful visual starting point, but a generated result should not automatically be treated as production-ready. Exact dimensions, clean topology, rigging, optimization, and print preparation may require additional work in dedicated software.
Make the subject simpler and state the missing feature more directly in the next request. Strengthening thin parts, reducing competing details, and checking the silhouette before adding texture can make the next pass easier to evaluate.
Yes, if the first goal is a simple, recognizable object and you are willing to inspect the result rather than expect a perfect one-click asset. Beginners can start with broad forms, then learn which prompt details improve each revision.